Implementation Steps
Step-by-step process
The process of implementing the Fireblocks Non-Custodial Wallet (NCW) involves the following step-by-step sequence:
- Complete the onboarding process to establish and configure your workspace.
- Ensure comprehensive disaster readiness by completing the setup process for the disaster recovery kit.
- Create the NCW Signer and NCW Admin API users.
- Configure the webhook URL to enable communication between your application and Fireblocks.
- Verify that you have at least one Transaction Authorization Policy (TAP) rule in place to govern your NCW transactions.
- Develop your backend server, and incorporate the essential webhook endpoint to facilitate the messaging related to multi-party computation (MPC) operations.
- Construct your mobile or web application, and integrate the NCW Software Development Kit (SDK).
- Enroll your users into the application.
- Create an NCW for each user.
- Generate MPC keys for each user with an NCW.
- Execute a key backup procedure for each user to guarantee access in case of contingencies.
- If allowed, provide users the option to initiate a full key takeover and enhance control over their assets.
Note about TAP rules for Sandbox usersIf you're a Fireblocks Sandbox user, your sandbox workspace's TAP automatically comes with a rule in place that allows any end-user wallet to transfer any amount to any destination. You can use the Fireblocks Console's TAP Editor to edit this rule or create additional rules as necessary.
If you're a new or existing Fireblocks customer using a production workspace, you will need to create a TAP rule that governs end-user wallet transactions.
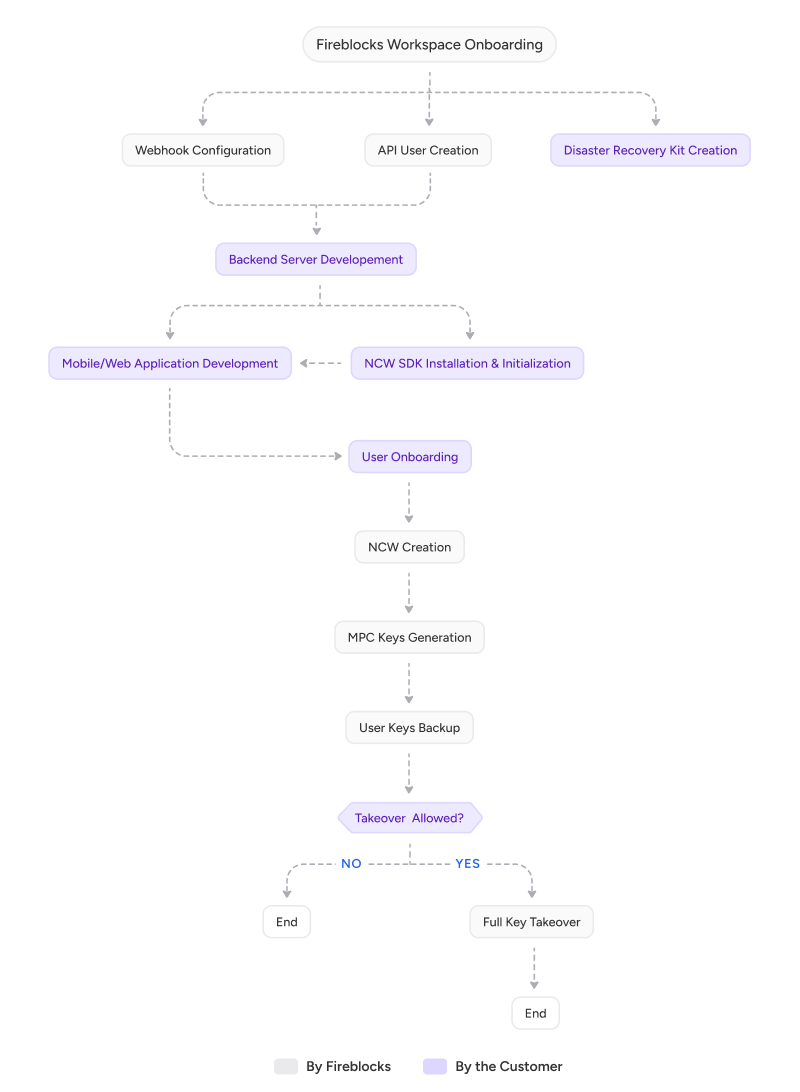
Flow chart
The following flow chart shows the successful deployment and utilization of a non-custodial wallet system.

Updated 3 months ago
