
Implementation Steps
Step-by-step process
The process of implementing the Fireblocks Embedded Wallet (EW) involves the following step-by-step sequence:
- Complete the onboarding process to establish and configure your workspace.
- Ensure comprehensive disaster readiness by completing the setup process for the disaster recovery kit.
- Create the EW Signer and EW Admin API users.
- Configure the webhook URL to enable communication between your application and Fireblocks.
- Verify that you have at least one Transaction Authorization Policy (TAP) rule to govern your EW transactions (relevant to the production environment and not sandbox).
- Set up your OAuth (SSO) configuration using your chosen Identity Provider (IDP), which will be used to authenticate end users.
- (Optional) Implement a webhook listener (e.g., for transaction updates) and notify end-user devices using push notifications or other relevant channels.
- Construct your mobile or web application and integrate the EW Software Development Kit (SDK).
- Enroll your users into the application.
- Generate MPC keys for each user with an EW.
- Execute a key share backup procedure for each user to guarantee access in case of contingencies.
- If allowed, provide the option to initiate a full key takeover and enhance control over their assets.
EW TAP rules for Production workspaces
If you're a Fireblocks Sandbox user, your sandbox workspace's TAP automatically has a rule that allows any end-user wallet to transfer any amount to any destination.
However, if you're a new or existing Fireblocks customer using a production workspace, you must create a TAP rule that governs end-user wallet transactions. Use the Fireblocks Console's TAP Editor to edit this rule or create additional rules as necessary.

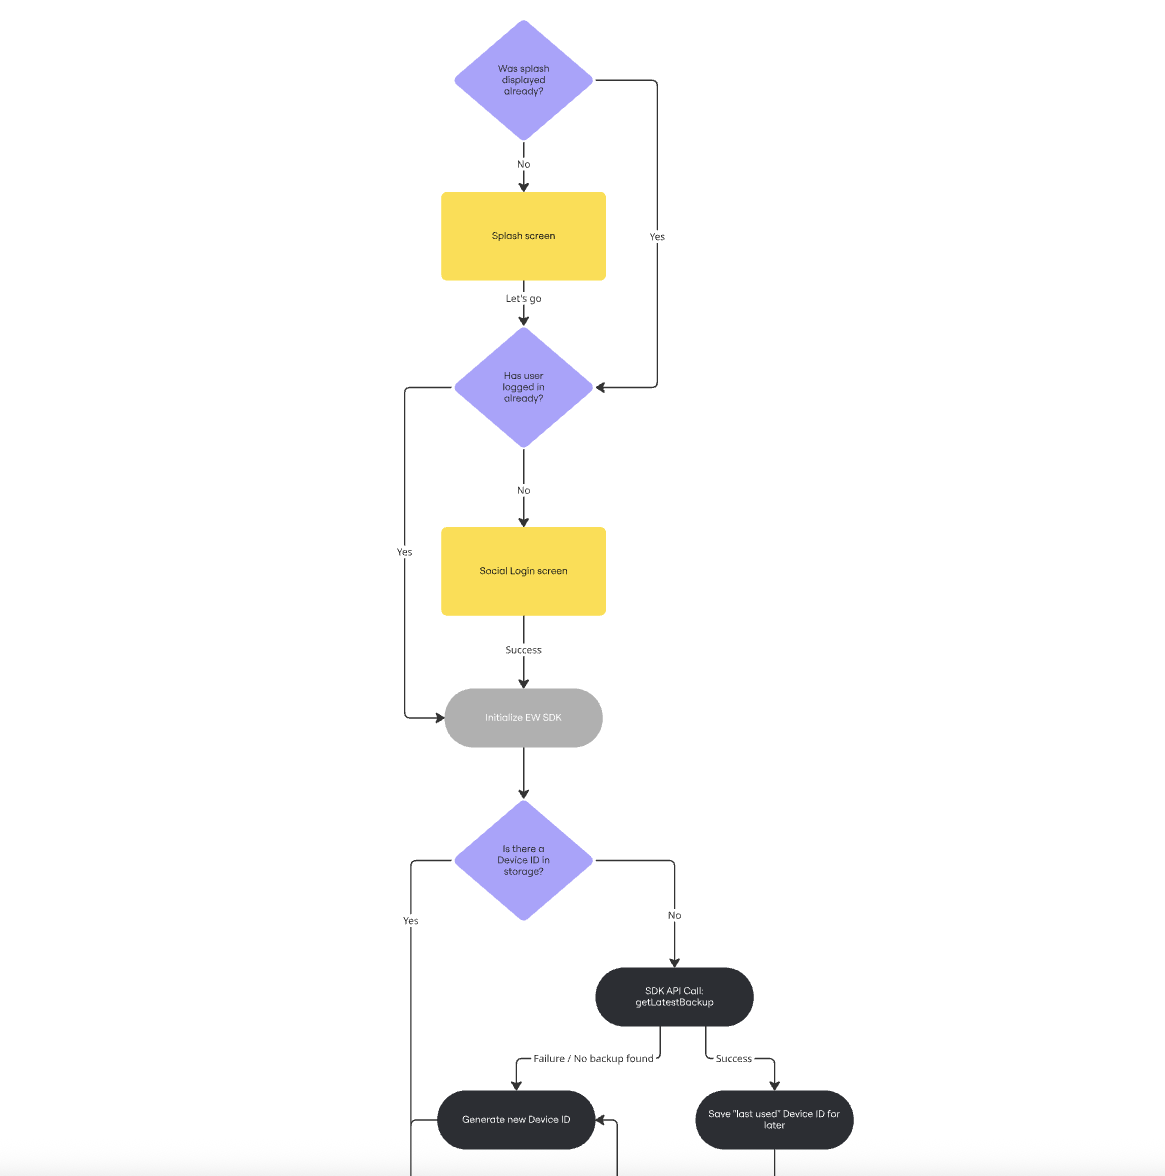
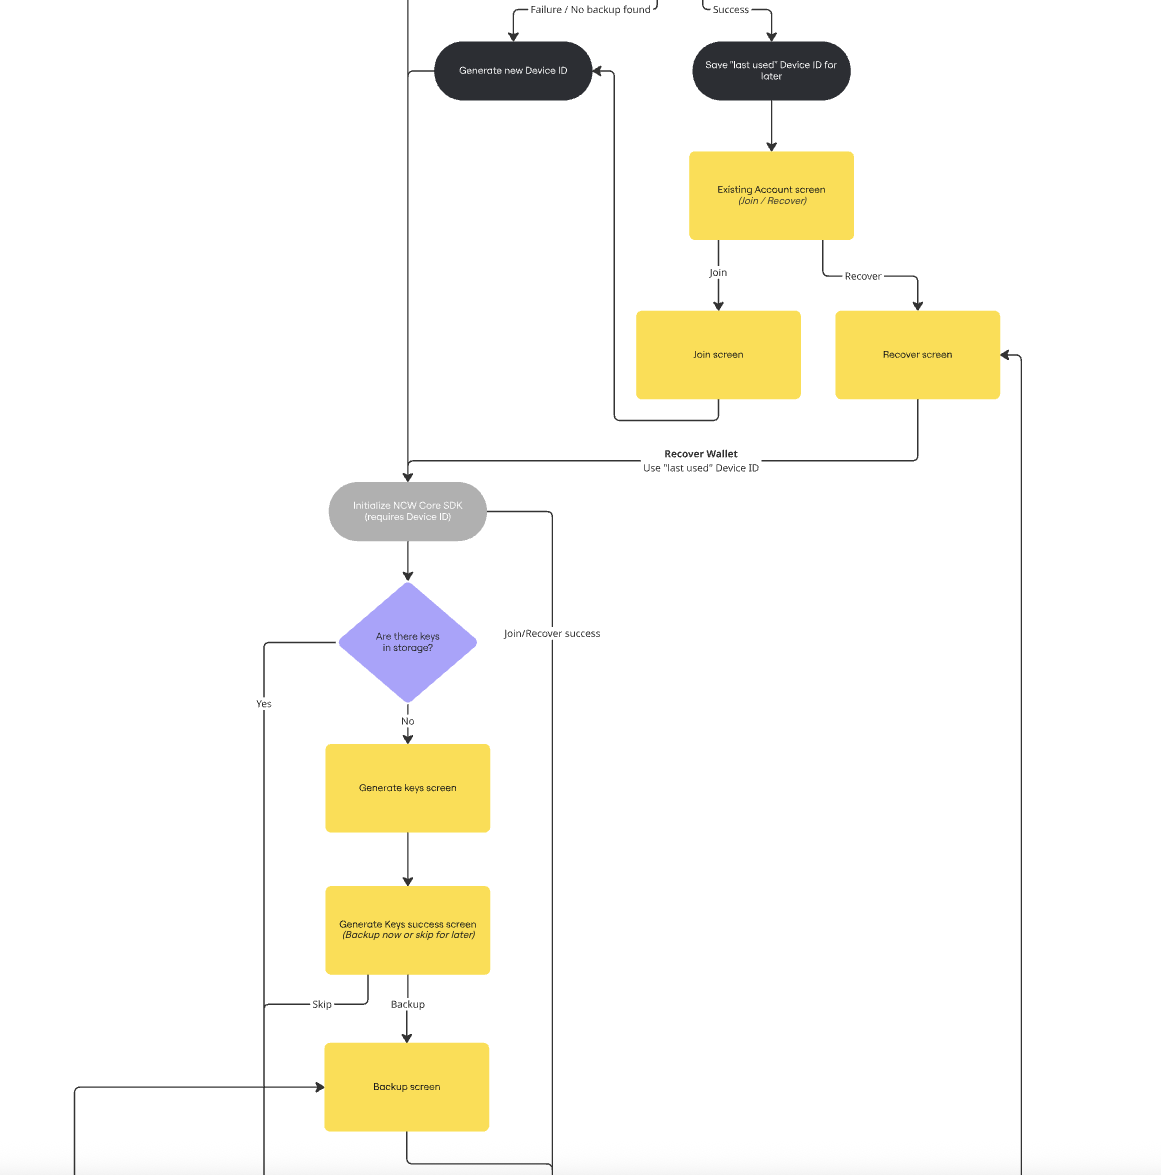
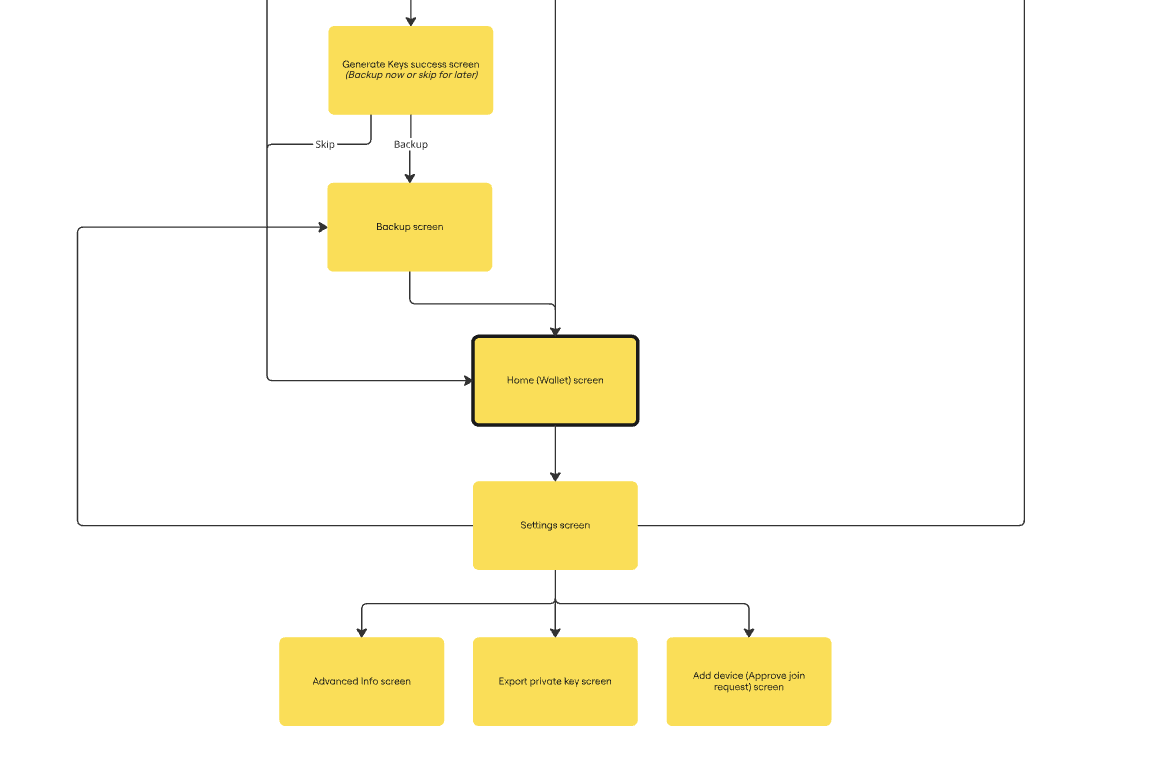
Flow chart
The following flow chart shows the successful work flow of a non-custodial embedded wallet system.
Updated 8 months ago
Did this page help you?